how to clean out a laptop with compressed air

Despite promises of a future where you only have to speak, wave or think at a gadget to make it work, for now you almost always have to touch a screen, button, keyboard or mouse. That means in short order your gadgets can collect oily fingerprints, dead skin, makeup, hair, food residue, spit, dust and any number of other gross things.It isn't just the gross factor, either. Dust, dirt and other contaminants can clog up gadgets, especially computers. This leads to overheating, which can slow down your electronics or cause permanent damage. But that's not the end of it.Don't forget flu and allergy seasons. Dirty electronics are a breeding ground for germs and bacteria - especially if you share a gadget with kids. And when you're out and about, pollen can stick to a messy gadget and travel indoors with you.Have we totally grossed you out yet? Before you dunk your gadgets in boiling water, though, we're going to tell you how to clean them without ruining them.Whether you're trying to clean a computer, smartphone, tablet, HDTV or any tech gadget, you just need to follow a few easy steps.

Reminder: Whenever you're cleaning a gadget, make sure it's turned off and unplugged (the exception being a computer, as we'll explain in bit).The best thing to clean a screen with is a microfiber cloth, which is soft and won't scratch. Don't use regular paper towels because these can cause scratches and nicks.We sell them in the Komando Shop, and they even have Kim's picture on them. Click here to take a peek.Most dirt and debris will just wipe away, but for more stubborn smudges and fingerprints, lightly dampen the cloth with distilled water. Don't pour the water directly on the screen!Some people mix the water in a 1-to-1 ratio with white vinegar or rubbing alcohol for a deeper clean. Note: Don't use glass cleaner on a computer screen or TV because many brands contain ammonia, which can ruin the screen surface.You can use the above tips to clean a DSLR lens, but make sure you're extremely careful. Before you use cloths or liquids, try using a bulb syringe or other low-powered air blower to blow away the dust.
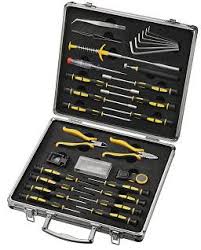
We sell a great camera cleaning kit in the Komando shop.A microfiber cloth works to clean the body of your gadget, too. However, a cotton swab does an even better job and can clean gunk out of the corners of the case or any open ports. If you're dealing with a keyboard, make sure you swab between each key.If the swab itself doesn't do the job, rubbing (isopropyl) alcohol is a good cleaner. Dampen the swab and go to town. Even though rubbing alcohol dries quickly, don't let it pool because it might leak into the interior. If it does, you'll need to wait 15 minutes or so before turning on the gadget to make sure the liquid evaporated.Cotton swabs also work great for cleaning a computer keyboard and the various ports and openings in the computer case. Some people use a can of compressed air for this task. In general, use the air can when you need to get rid of lots of loose buildup and save the swabs for sticky gunk and detail work.Where compressed air really shines is cleaning out your laptop or desktop.

If you're afraid to open up your computer, you can simply spray the air into the fan's exhaust vent.
best rated air purifiers for cigarette smokeSpray in quick bursts to prevent your computer's fans from spinning too fast.
best furnace mounted air cleanerExcessive spinning can damage them.
spray gun cleaner pumpYou can also stick a pencil or pen between the blades as you spray to prevent it from spinning.Bonus tip: Run over frequently touched surfaces periodically with disinfectant wipes to kill germs. Keep some handy during flu season for keyboards and mice and use them either first thing in the day or before any new person starts using the gadget.Opening up your computer allows you to get an even deeper clean and get rid of dust and hair that can cause overheating.

You should do this at least very six months. If you live in a dusty environment like Phoenix, or have pets, every few months might be better.As always, when working inside a computer, static electricity is your enemy. Be sure to ground yourself before putting your hands near any electrical components. You can do this by attaching a grounding strap to the case. Remember, don't unplug the computer or this won't work.Once the computer is open, you can wipe down the case and any non-electrical parts - including fans, the power supply casing and optical drives - with a dry cloth. Use microfiber or a paper towel, it doesn't matter.When it comes to electrical components, such as the motherboard, RAM and any add-on cards, use compressed air. Again, brace any interior fans so they don't spin too fast and get damaged.When it's time to blast with air, we strongly recommend goggles and a dust mask, especially if the inside of your computer looks like this dust trap. Definitely do your cleaning in a well-ventilated or outdoor area, like a porch or backyard.

You can also have a vacuum cleaner on hand to pick up loose dust or pull it out of the air.For stubborn or built-up dust areas, a paper towel can work, just be very careful not to push too hard and damage parts on the circuit board. Don't use anything cloth-based because it might have built-up static electricity. Also, don't use cotton swabs because they catch on circuit board components and leave cotton fibers behind that will cause damage later.If you haven't cleaned your gadgets in a while, the entire cleaning process - screen, outside case and inside case - might take a while. However, if you do regular cleanings after that it should go much faster so make it a habit of tidying up periodically.Perhaps one of the worst threats your Mac faces is the chance of being doused with water or other liquid: In a second, a cup of coffee could leave you about $1500 in the hole for a new Mac (plus $5 for another latte). Unfortunately, warranties for your Mac (and other electronics) do not cover accidental liquid damage.

And if you bring your broken computer to an Apple store for repair, techs may check built-in sensors that will indicate whether or not liquids may have contributed to the problem at hand. Since we all have had instances of liquids coming dangerously close to our Macs, here are some quick tips for avoiding disaster, and plus a few more that could help fix your Mac should you manage to souse it. Use a lid: While it is always nice to have a drink with you while you are working on your system, the easiest way to prevent a spill is to simply avoid the practice altogether. However, since that expectation is a non-starter for most folks, you can look into alternatives to simply popping open a soda, beer, or cup of coffee or tea and plunking it down next to your system. If it’s a cup of java, put a lid on it. If it’s a bottle of water, ditto. If it doesn’t have a lid of its own, find something that can serve the purpose (tightly crumpled aluminum foil, for example). Keep your distance: Any spilt liquid will take time to spread as it pours around and among the various obstructions in its path.

So while you might like to have your drink right next to your keyboard or laptop, consider moving it a bit farther away. The distance will give you time to grab your Mac and other devices before the liquid gets to it. Another possibility: Place something like a book between it and your system. Then, if you do spill, the book will divert the flow away from your system. Alternatively, when using your Mac, elevate it on a book, or even a few magazines. That could prevent the liquid from getting into your Mac’s vents and other channels. Cover your system: Keyboard covers and some sleeves can all help prevent liquid getting into your Mac. There are innumerable such products on the market; pick one and use it. Even if you take all the precautions you can, you might still find yourself at some point with a wet Mac. If so, then all may not be lost; however, keep in mind it may take some time before your system will (you hope) be up and running again. First, do not wait to see if the system is OK.

Assume the worst and immediately turn it off and unplug it. If you can, remove the battery. (Unfortunately, in most modern Macs the battery cannot be removed.) After you've shut off the system, you'll need to try to dry it out. Unfortunately this unavoidably take time. While liquids on a surface will evaporate relatively quickly, those trapped in nooks and crannies will take much longer. However, you can speed this process up a few ways: Open it up: The first thing you can do is keep the system as open as possible, to allow air to circulate and remove moisture. This can be done on laptops by undoing the screws on the back and popping open the lid, then removing any easy-to-access parts such as RAM and hard drive (if it can be removed). Blow in some compressed air: Use compressed air—either in a can or from an air compressor (if available)—to blow out as much moisture as possible. This is one of the better things you can do to speed up the drying process. Try to blow in and around every nook and cranny, and especially if you see any spattering or other indications that liquid is sill in the area.

Be vigilant here, and work the air into as many areas as you can while watching around others to see if any liquid shoots out. Soak up any you see with paper towels, Q-tips, or something else that’s absorbent. Use desiccant: The rate at which water evaporates depends partly on how dry the air is around it. So to help the water escape from your Mac, you can try to use a desiccant. Good ones include Drierite and Silica Gel. If you can’t get those at a local store, you can use rice from a sealed package. Rice is not a great desiccant, but it can be better than nothing. Put a few cups of the desiccant in a bag, and then place your Mac into the same bag, ensuring it is covered by the material. Then simply wait about three days to thoroughly ensure the system is dry. Granted it may be painful to go this long without your system, but it may be better to be safe than sorry. (If you use rice, remember that it can get into port openings and such.) Finally, two other alternatives for when you're really desperate.

Caution: You only want to try these if you've exhausted all other possibilities and you'll otherwise just throw the thing away. Bake it: Heat is obviously a good way to dry things out, but you have to be careful: Your Mac can withstand sustained storage temperatures of about 105 to 110 degrees Fahrenheit (when shut off). So if you can put it in an environment that’ll safely and reliably stay at or just below the temperature, you can try it. To do it in a standard kitchen oven, place your Mac in the oven along with a thermometer, then turn the oven on at its lowest. Prop the oven open and watch the temperature. When it reaches 100 degrees, turn the oven off and close the door. The inside temperature should maintain for a while. As it drops, you can then turn it on for a few minutes to crank up the heat a little, followed again by turning it off and waiting. An alternative to the oven is a heating pad, which can be purchased at a local drug store. The benefit of a heating pad is that you can heat the system while it is encased with desiccant, using two methods at once.

Alcohol or distilled water: Unfortunately not all liquids poured into electronics are basic water. Sticky, creamy, or salty messes are a lot less forgiving. In these cases, you may need to have a technician fix the system by replacing parts or cleaning it out. However, if you want to chance it, consider washing it out with distilled water or over-the-counter isopropyl alcohol. Again, this is a last-resort to fix a system that is not covered by warranty, too costly to fix, or is otherwise a dead issue. Try pouring the alcohol into the same area as the original spill, and then blow it out. Repeat this several times to clear out as much of the original liquid as possible, and then follow the above suggestions to dry the system out. This is one of those “it can’t hurt” situations: You should only try the steps above (particularly those last two) as last resorts—when your Mac won’t start, it’s out of warranty (or the warranty is voided by the liquid damage), and you can’t afford the repair bill.